Space to Grow
Interacting Galaxies
Making a Colour Image with IRIS
Another activity you might like to undertake with your students is to create a colour image with your data. Not only will you produce a stunning colour image, you can use this exercise to teach students about what happens when different coloured light combines. It can also be used (depending on the data) to show that stars and different regions of galaxies have different colours and lead on to a discussion of why this is so.
Note: In order to do this, you must have 3 images of the same object, one taken through the B filter, one through the V (green) filter and one through the R filter.
Make sure your image filenames have the correct .fit extension. If not, simply rename image.fits to be image.fit
Make sure your image filenames contain only lower-case letters. If your files have capitals in the filenames, simply rename them using lower-case letters.
Start IRIS by double-clicking on the program icon.
- Load and superimpose the images taken through the B, V and R filters.
Select View » (L)RGB... You need to put the filename (drop the .fit extension) in the appropriate box and click OK.
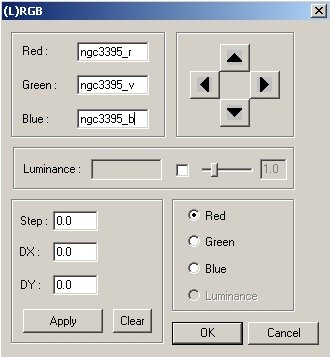
Figure 11: (L)RGB settingsThis will load and superimpose the images. The screen will probably appear black initially and in order to see the resultant image more clearly, click Auto in the Threshold window. Note: DO NOT at any point click on any of the four coloured buttons in this Threshold window. Alternatively, you might want to play with the sliding bars in the Threshold window to obtain a clear view of the objects in the image. (Note: the Threshold window sets the brightness at which the pixels in the image are shown to be white - in this case at a brightness of 32767 - and the brightness at which the pixels in the image are shown to be black - in this case a brightness of 0).
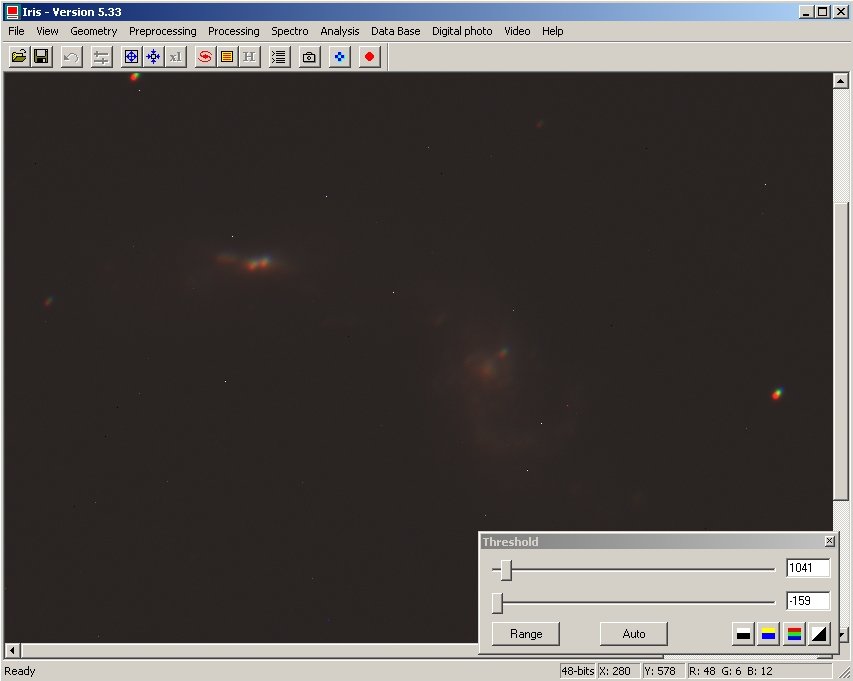
Figure 12: Stacked images
If you look closely at the stars (rather than the galaxies) in this superimposed image, you will be able to distinguish the image of the stars taken through the red filter (red dots), the image of the stars taken through the visual filter (green dots) and the image of the stars taken through the blue filter (blue dots). How much the telescope has moved between each image will determine how closely aligned the stars are at this stage. You may also notice that the image itself has a general hue (i.e. the background is not black - in this case it has a reddish hue). This will depend on how much light was let through each filter (in this case, the light coming through the red filter was stronger than that coming through the green or blue filters) and may not be the case if you have previously selected Modified Equalization (refer to the Colour Images teaching module).
You now need to shift each of these individual images (red, green, blue) so that they line up on top of each other. This process is quite subjective but you should be able to obtain a reasonable result.
- Line up the images.
Select View » (L)RGB...
Panel A indicates which image you are manipulating (red, green or blue). Panel B is the controller where you move the image. The Step field in Panel C is where you indicate by how much you want the image to move at once.
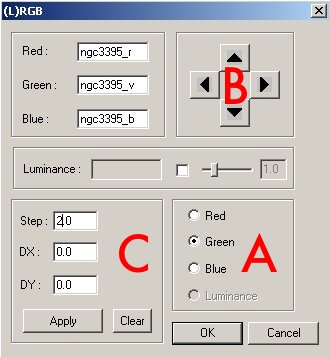
Figure 13: Control PanelStart with the visual (green) image (Green is checked in Panel A) and try to align it with the red image. Start with a coarse adjustment of 2 pixels (input 2.0 into the Step field in Panel C). Now, using the controls in Panel B, move the green image until it lines up better with the red image. What you are trying to do is make the stars round and their centres white (when you combine red, green and blue light - you end up with white light). You will need to adjust the Step to be much smaller as the alignment improves. Repeat this for the Blue image. Do not click OK until after you have completely finished lining up the images.
Once you are satisfied with your alignment, click OK .
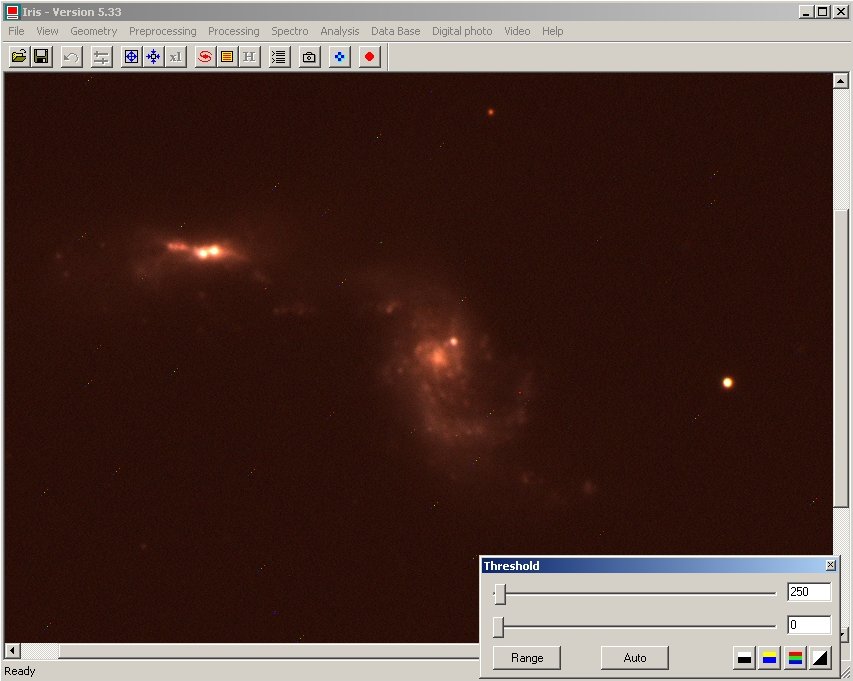
Figure 14: Aligned!
You will notice in this example that the stars have a reddish ring around the outside. The red images are slightly larger than the others. This may be due to observing conditions, different exposure times for the different coloured images or variations in the transmission of light through the different filters. Unfortunately, there is not a lot you can do about this.
- Adjust the White Balance.
In an effort to eliminate the reddish cast the image has, select View » White Balance Adjustment... Here again it's a matter of playing with the controls until you achieve the look you want. You may also want to play with the Gamma Adjustment, Contrast adjustment and Saturation adjustment under this View menu. There is no hard-and-fast rule about how to make the image look its best, it really is a matter of you tweaking the controls. It's best to be able to see your galaxies as you are making the adjustments. You may also wish to refer to the Making a Colour Image teaching module for more information on other display options, but before making further changes, go to the next step to save your image.
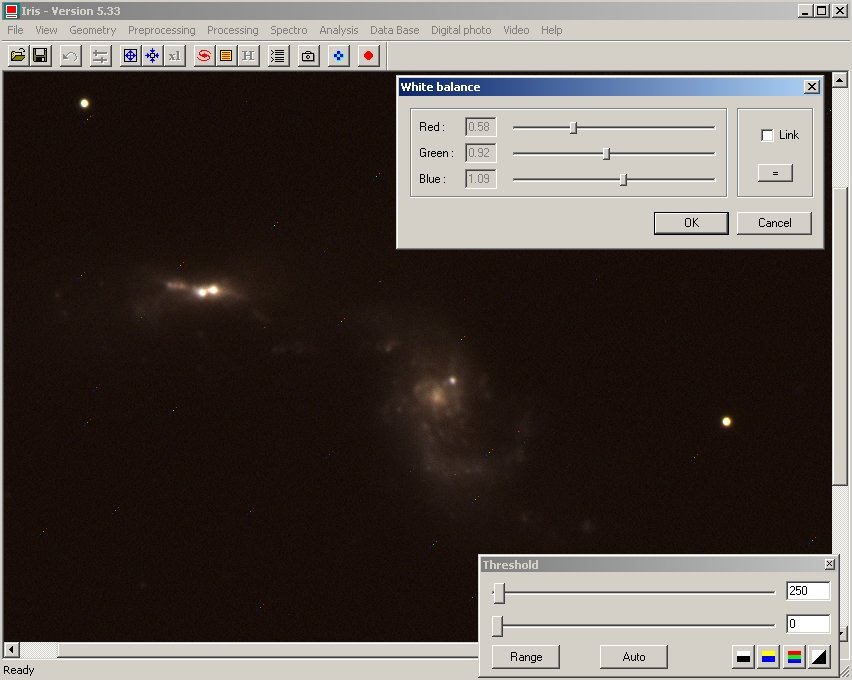
Figure 15: Adjust the white balance
- Save your colour image.
Once you are satisfied with your image and you are ready to save it, select File » Save... This gives you multiple options for your save format. If you want to use the coloured image in IRIS (e.g. to make a mosaic out of several images) then you need to select .pic format. Otherwise, you must save it in a format compatible with your other software (e.g. tif, jpg). DO NOT save it as a FITS file or your work will be lost.
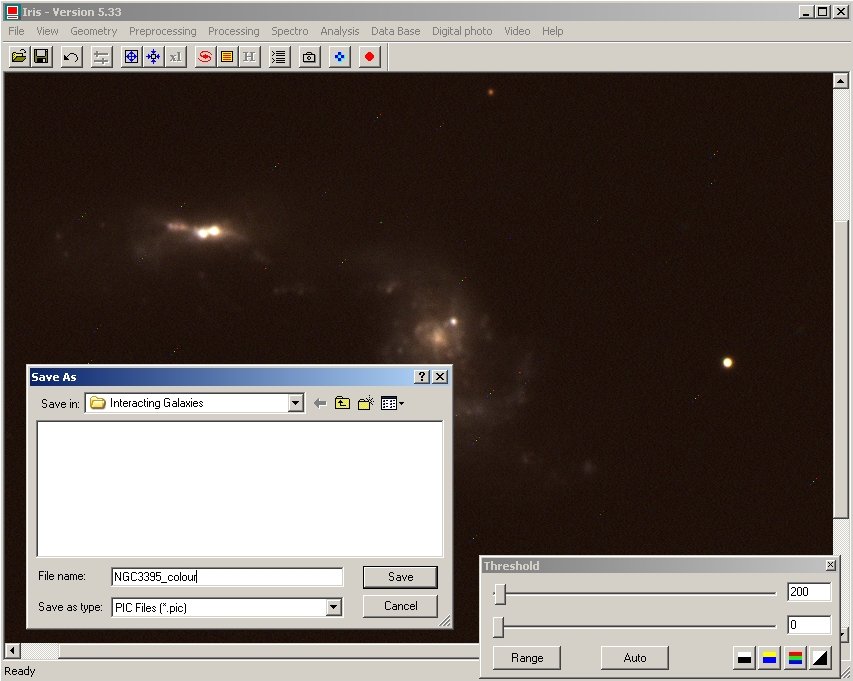
Figure 16: Save your image
External Resources
Return to the main page for this module
Exercitationem
Visi ut aliquid ex
Ut enim ad minima veniam, quis nostrum exercitationem ullam corporis suscipit laboriosam, nisi ut aliquid ex ea commodi consequatur.
Visi ut aliquid ex
Quis autem vel eum iure reprehenderit qui in ea voluptate velit esse quam nihil molestiae consequatur, vel illum qui dolorem eum fugiat quo voluptas nulla pariatu
Et harum quidem rerum facilis est et expedita distinctio.