Space to Grow
Asteroid Investigation
Stacking images to show path of Asteroid
One interesting exercise you might like to do is to stack all the images in the sequence to show the motion of the asteroid in a single image. You could compare these stacked images for different asteroids to illustrate how each asteroid moves at a different speed and in a different direction.
- Load the required FITS files (in this example you are only going to use the first 4 images of EL88).
- Stack the images.
Once you are connected to the internet, select Astrometry » Track and Stack...
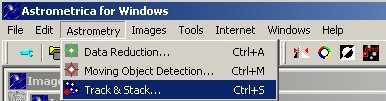
Figure 13: Track and Stack, baby.This will pop up a Select Images window. Click on Add and select the images you wish to stack (again you can hold down the control key to select multiple images).

Figure 14: Select Images.Click on OK once you have selected all your images. Once again, Astrometrica will pop up a small window indicating the Date and Time for each of the selected images. Click OK for each one as the data are taken from the image header and should be correct.
The next window to pop up is the Coordinates, Tracking and Stacking window. Here you can choose to track either the Asteroid (you will have several images of each of the stars) or the stars (you will have several images of the asteroid). It also gives you the option to Add, Average or Median your images together.
In this case you want to track the stars (you will only have one instance of each star but 4 instances of the asteroid). Click on the Average button and then OK to stack the images.
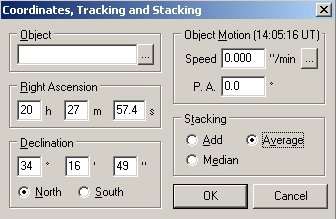
Figure 15: Settings for tracking on the stars.Astrometrica will now go through the process of matching the objects in the Faulkes Telescope images to the objects in the USNO-B1.0 catalogue, just as it did when you were determining an accurate position for the asteroid. Once complete, it will return an image showing the matched stars and the asteroid moving against the backdrop of stars.
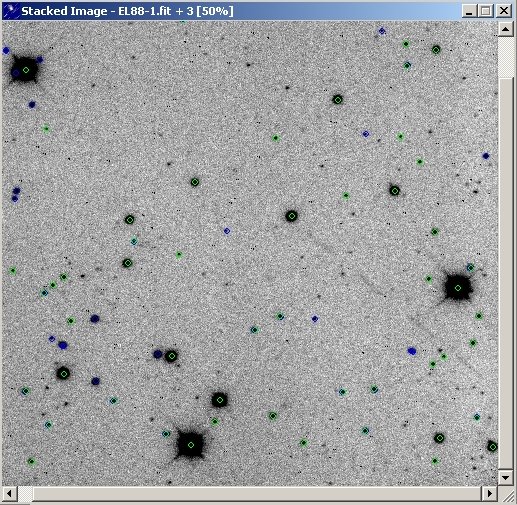
Figure 16: Stacked Image. - Remove the coloured identifiers.
You don't really want these in your exported image. Go to Images » Select Markings...
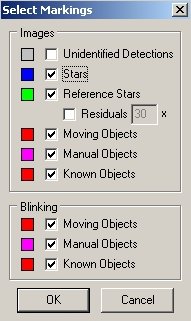
Figure 17: Remove the coloured identifiers.Uncheck all of the boxes and click OK.
Note: Astrometrica will remember that you have unchecked the boxes, so next time you identify objects in an image, it will not circle the reference objects unless you recheck all the boxes.
- Adjusting the contrast.
An optional step you might like to try before exporting is to adjust the contrast in your image to really bring out all the features. Select Images » Background and Range... This pops up the Background and Range window.
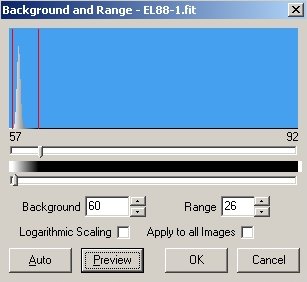
Figure 18: Twiddle the Contrast.From here it is a bit of an art, but basically you play around with the sliders in this window to achieve the desired effect. Use the Preview button to see what effect the changes you are making are having on your image. Once you are happy with how your image looks, click OK.
- Export the final image.
Now you have your stacked image showing the motion of the asteroid you should export it for use in other programs. Select File » Export Image to... » JPEG... and click Save.
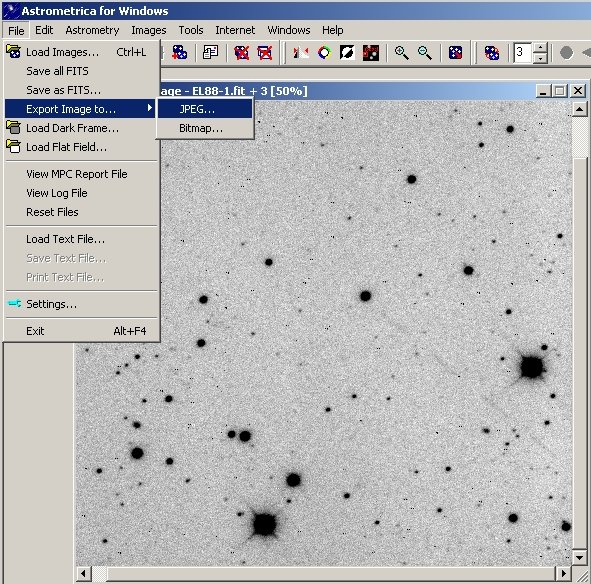
Figure 19: Save the file.
Making a colour image of your asteroid using IRIS
Return to the main page for this module
Exercitationem
Visi ut aliquid ex
Ut enim ad minima veniam, quis nostrum exercitationem ullam corporis suscipit laboriosam, nisi ut aliquid ex ea commodi consequatur.
Visi ut aliquid ex
Quis autem vel eum iure reprehenderit qui in ea voluptate velit esse quam nihil molestiae consequatur, vel illum qui dolorem eum fugiat quo voluptas nulla pariatu
Et harum quidem rerum facilis est et expedita distinctio.